
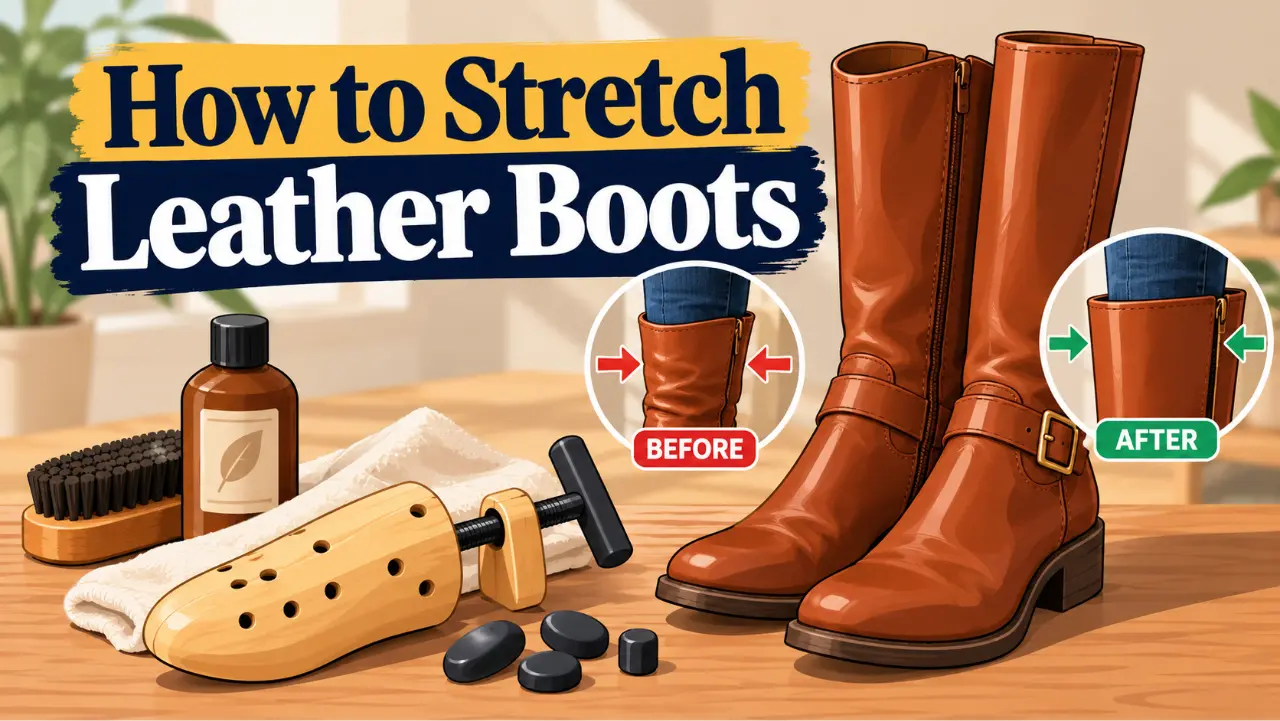
Leather boots can stretch, but how much they’ll give depends on the leather, how the boots are made, and where you need more room.
There are several ways to go about it, from boot stretchers to the DIY tricks you see online. Some are worth trying. Others I’d be careful with.

How to Stretch Leather Boots Safely
I’d use a boot stretcher rather than trying to force the leather with heat or ice. Choose one that matches the area you want to stretch, apply a little pressure, and leave it overnight. Try the boots on the next day before deciding whether they need another round.
For extra width, use a width stretcher. A calf stretcher works on tight boot shafts, while pressure-point plugs can help when one toe is rubbing.
You can also use a leather stretching spray to help the leather give a little, provided it’s suitable for your boots.
Just don’t expect miracles. Leather can give you some extra room, especially across the width, but stretching won’t reliably fix boots that are too short or several sizes too small.
And if you’re dealing with expensive boots or aren’t sure how much pressure the leather can take, I’d ask a cobbler before experimenting.
There’s more to stretching leather boots than turning the handle on a stretcher. Below, I’ll walk you through the different tools, how much extra room you can realistically get, and what to do when the toes, width, or calves are too tight.
I’ll also look at the hair dryer and freezer tricks, including what boot manufacturers actually say about using heat.
Let’s jump right into it…
Boot Stretching Explained
Leather will give a little. If your boots are slightly tight, they may just need some time to break in. As you wear them, the leather flexes and gradually starts molding around your foot. A full-leather boot can take as long as a month of regular wear to properly break in.
Sometimes that’s enough. If there’s a particular spot that stays painfully tight, though, I wouldn’t spend a month hoping it’ll eventually sort itself out. That’s when stretching starts to make more sense.
A little pressure across the ball of your foot is one thing. A tight boot shaft around your calf is another. Both can often be stretched. Length is much less forgiving.
The leather itself makes a difference too. Thickness, tanning and finish can all affect how readily it gives.
Thick, heavy leather usually won’t give as easily as something softer and more pliable, and even different parts of the same hide can behave differently. Add a lining or reinforced construction and you may have even less room to work with.
A little moisture can make leather easier to work, which is why stretching sprays are usually paired with pressure from your foot or a stretcher.
Patent leather won’t give as readily as ordinary leather, and I’d be much more careful with suede or nubuck. If the boots are synthetic rather than genuine leather, don’t assume the same stretching methods will work.
| What You’re Feeling | What I’d Do |
|---|---|
| Tight across the ball of the foot | Stretch the width |
| Pressure on top of the foot | Stretch the vamp or instep |
| One painful little-toe spot | Use a pressure-point plug |
| Shaft squeezing your calf | Use a calf stretcher |
| Thick seam pressing into your foot | Ask a cobbler about flattening it |
| Toes hitting the end | Don’t rely on stretching |
| Toes hitting a steel or composite cap | Stretching won’t move the cap |
| Zipper barely closes | Don’t force it |
| Boot bends in the wrong place | Recheck the size and last |
What Are Boot Stretchers?
Boot stretchers are tools that sit inside a boot and put pressure on the areas that need more room. You open the stretcher gradually and leave it under tension while the leather adjusts.
There isn’t one stretcher for every job. A forefoot stretcher is made for tightness around the foot. If it’s the boot shaft squeezing your calf, you’ll need a calf stretcher instead.
Some come with little plugs for problem spots. Say the boot fits everywhere except around your little toe. You can put a plug there and work on that spot without opening up the whole forefoot.
As for materials, you’ll find wood, plastic, and metal used in all sorts of combinations. Wooden stretchers tend to be the heavier-duty option and can be worth the extra money if you’re going to use one regularly.
I still wouldn’t choose a stretcher just because it’s made of wood, though. A solid one that turns smoothly and actually fits your boots is more useful than an expensive wooden stretcher that doesn’t.
You don’t need to buy two stretchers. One works perfectly well. You’ll just have to stretch one boot, take it out, and then do the other. But if both boots need stretching, I prefer having a pair. It saves you the wait.
What Are the Different Types of Boot Stretchers?
You’ll run into several kinds of stretchers, and they’re not interchangeable. Before buying one, figure out whether the problem is at the forefoot, one small pressure point, or up around the calf.
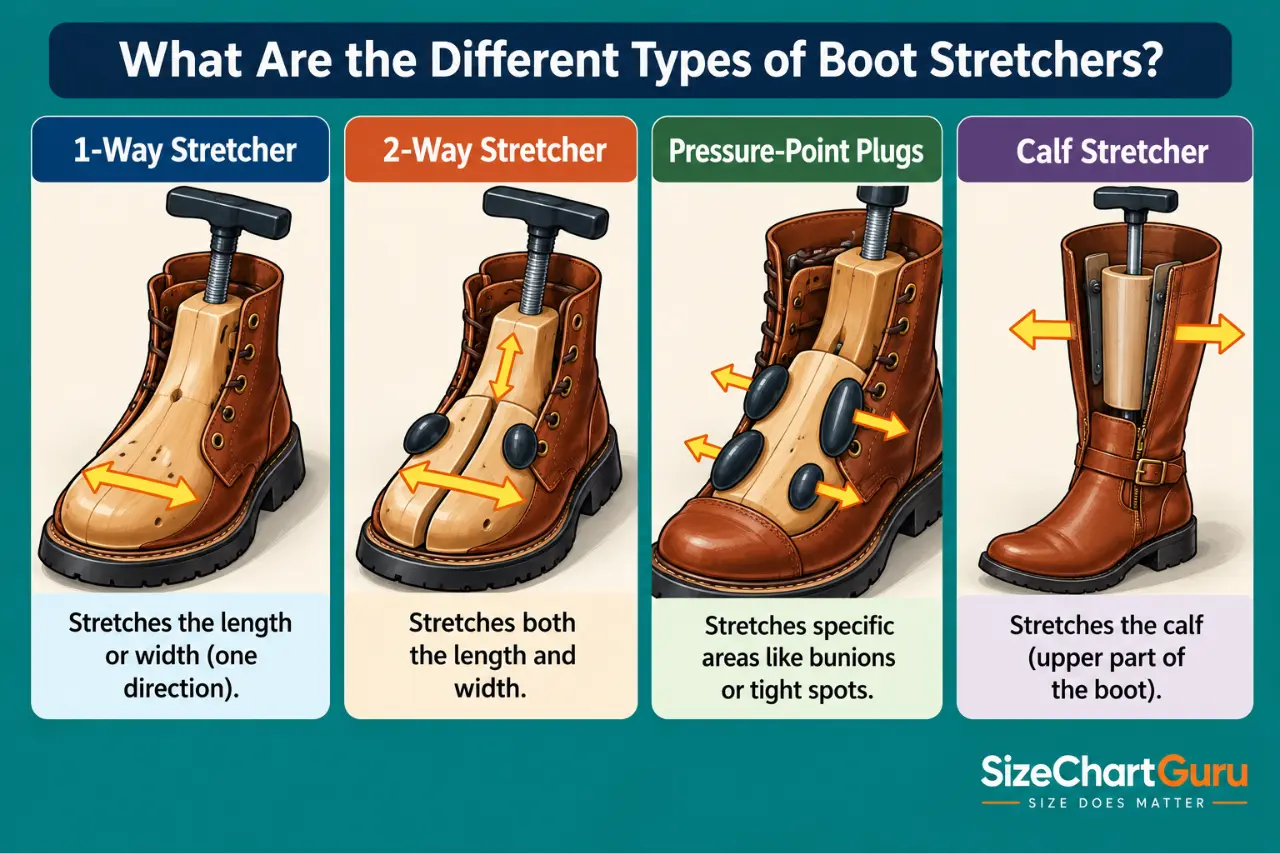
1-Way Stretcher
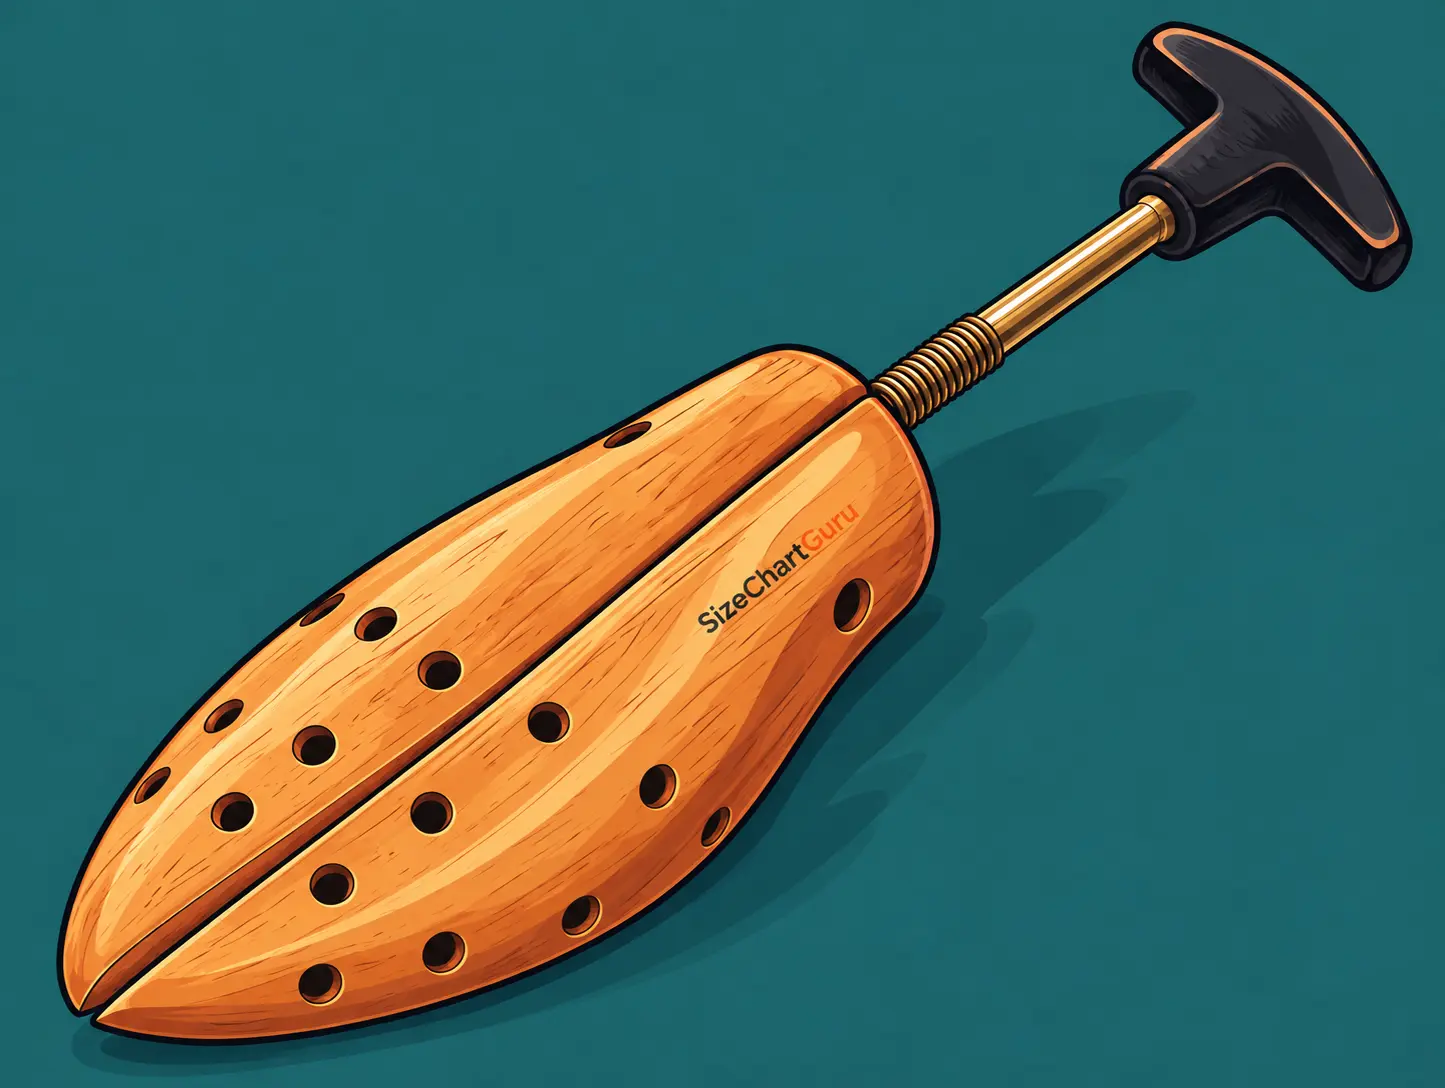
A 1-way stretcher works on width. It sits inside the foot of the boot and opens from side to side, putting pressure across the forefoot.
This is the one I’d look at if the boot is the right length but feels too tight across the ball of your foot or around the toes.
2-Way Stretcher
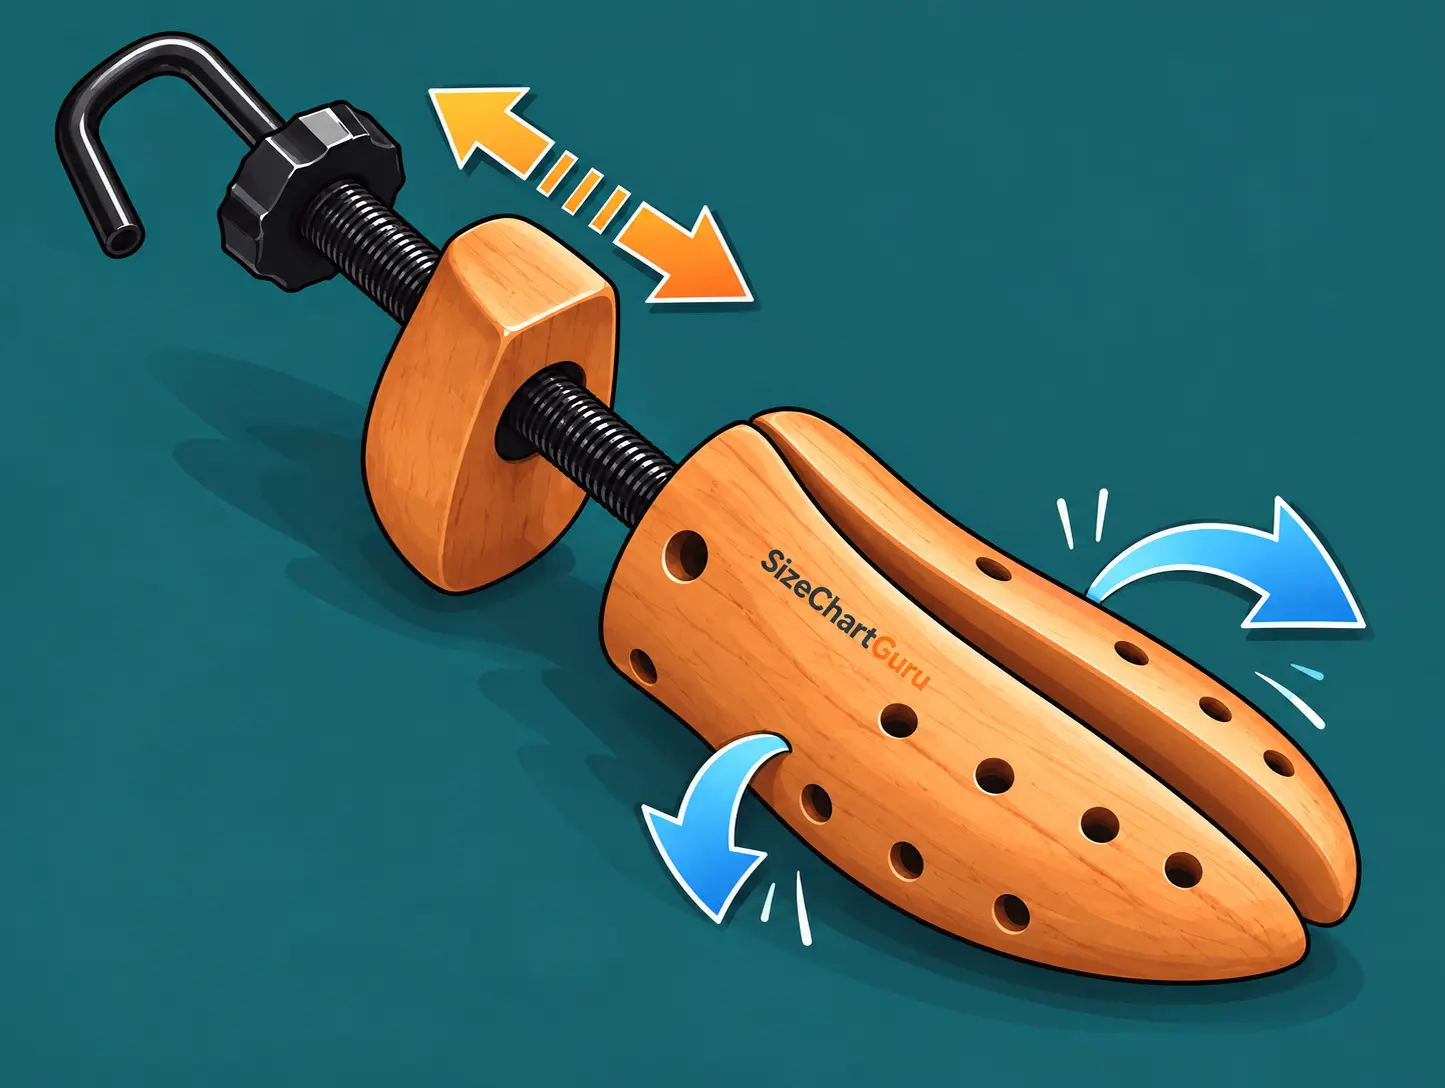
A 2-way stretcher gives you width adjustment too, but adds a second mechanism for length.
Don’t read too much into that length adjustment. You’re not going to turn a size 9 boot into a 9.5 by cranking the handle.
It can help with a little extra room, but if your toes are firmly hitting the end of the boot, you’ve probably got a sizing problem rather than a stretching problem.
Boot Stretchers With Pressure-Point Plugs
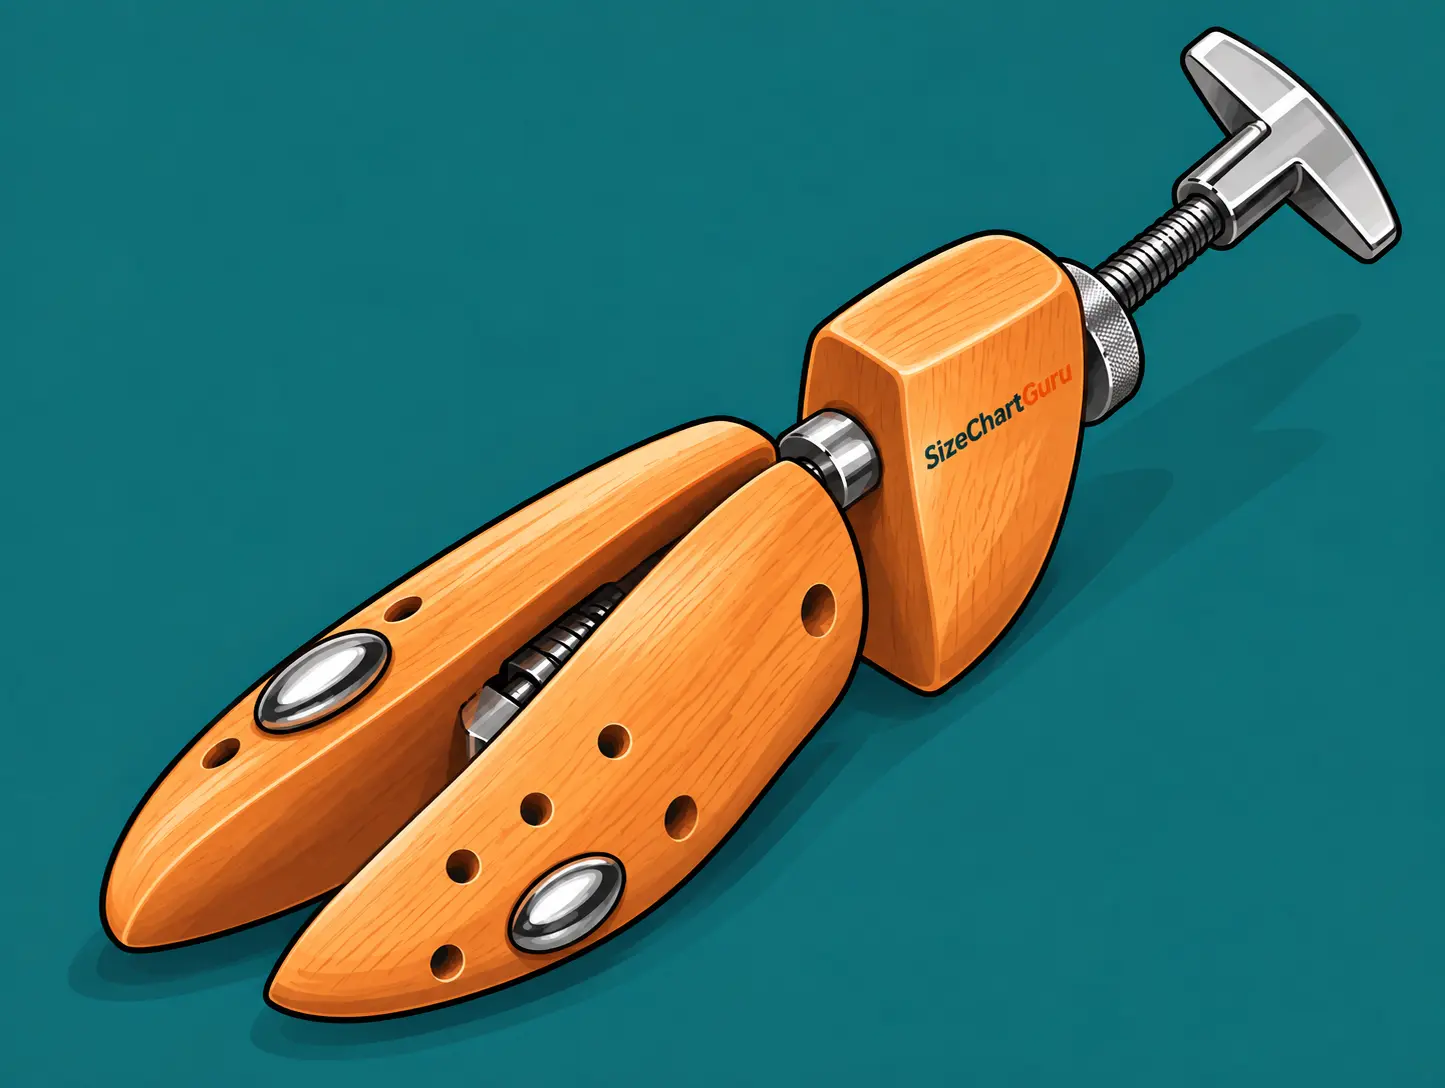
Pressure-point plugs let you stretch one specific spot without making the entire forefoot wider.
If the boot fits well except for a spot near your little toe, put a plug in the corresponding hole on the stretcher to concentrate the pressure there.
Some stretchers come with the plugs. Others don’t, so check before you buy.
Boot-Calf or Shaft Stretcher
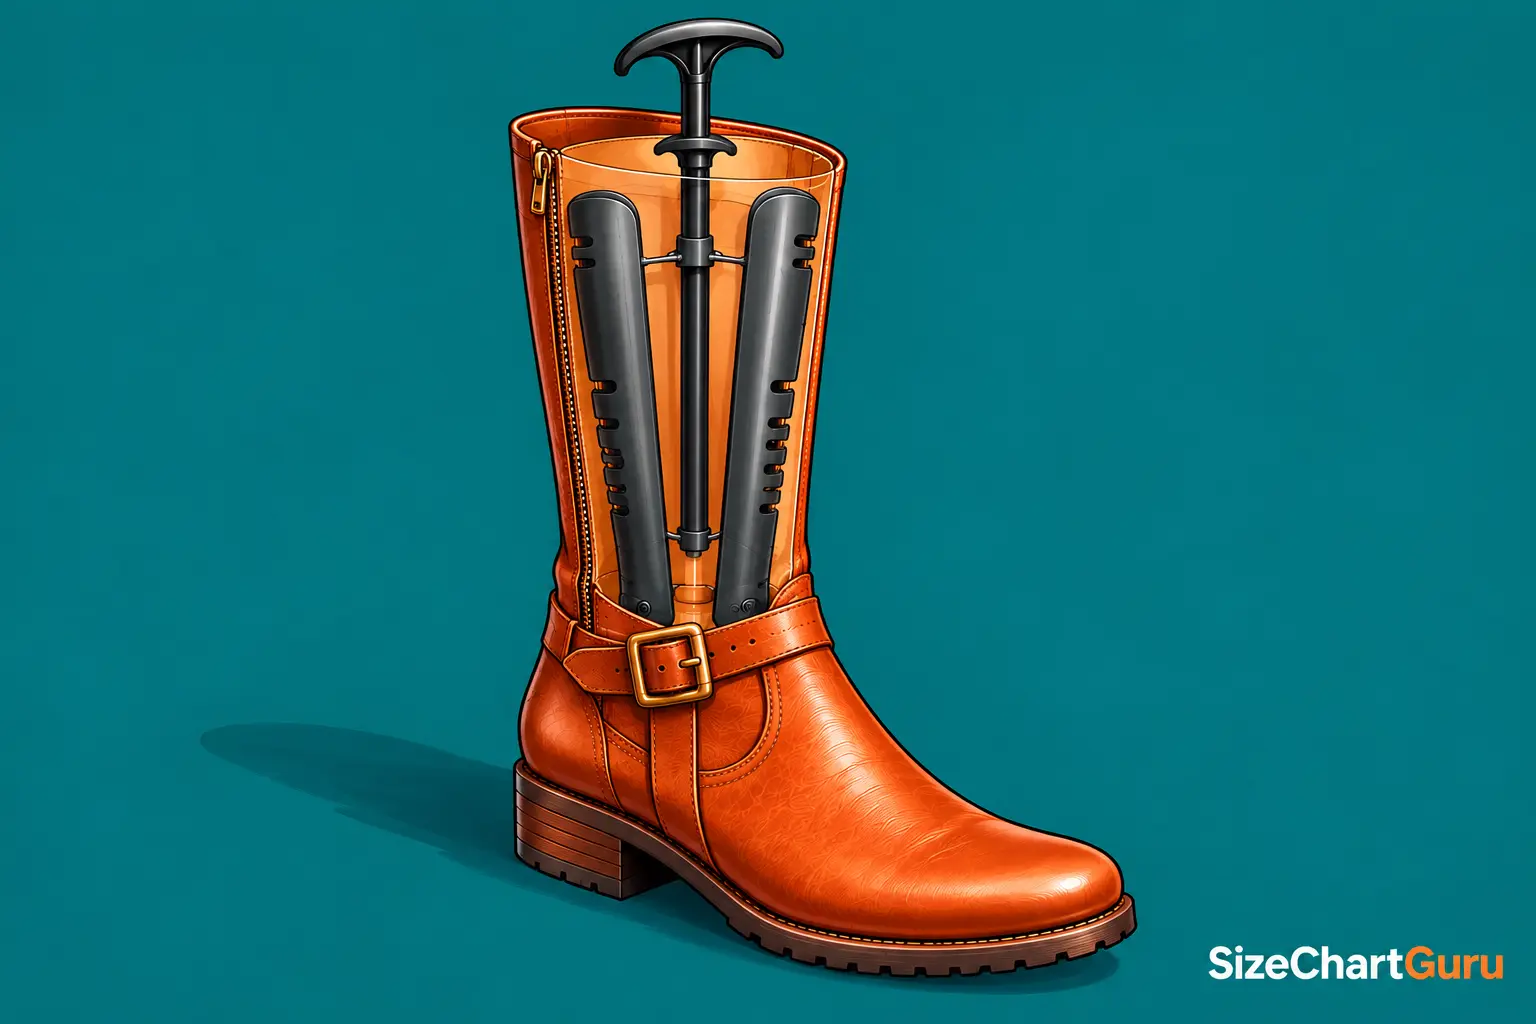
This is a completely different-looking tool. Instead of sitting down in the foot of the boot, a calf stretcher goes into the shaft and expands outward against the leather.
Most have a long handle sticking out of the top, which is useful for obvious reasons. Try reaching down inside a tall riding boot to adjust a short handle and you’ll understand why.
Some models can also work lower down around the throat of the boot, just above the instep. That’s worth knowing if the calf itself feels fine but getting your foot through the bend of the boot is the struggle. Check the stretcher before you buy, though. They’re not all made to reach that area.
If the foot of the boot fits well but you can barely get the zipper over your calf, a calf stretcher is the one you want. We’ll get into how to use one properly later because there’s a little more to it than simply opening it as far as it’ll go.
Shoe Trees Aren’t Boot Stretchers
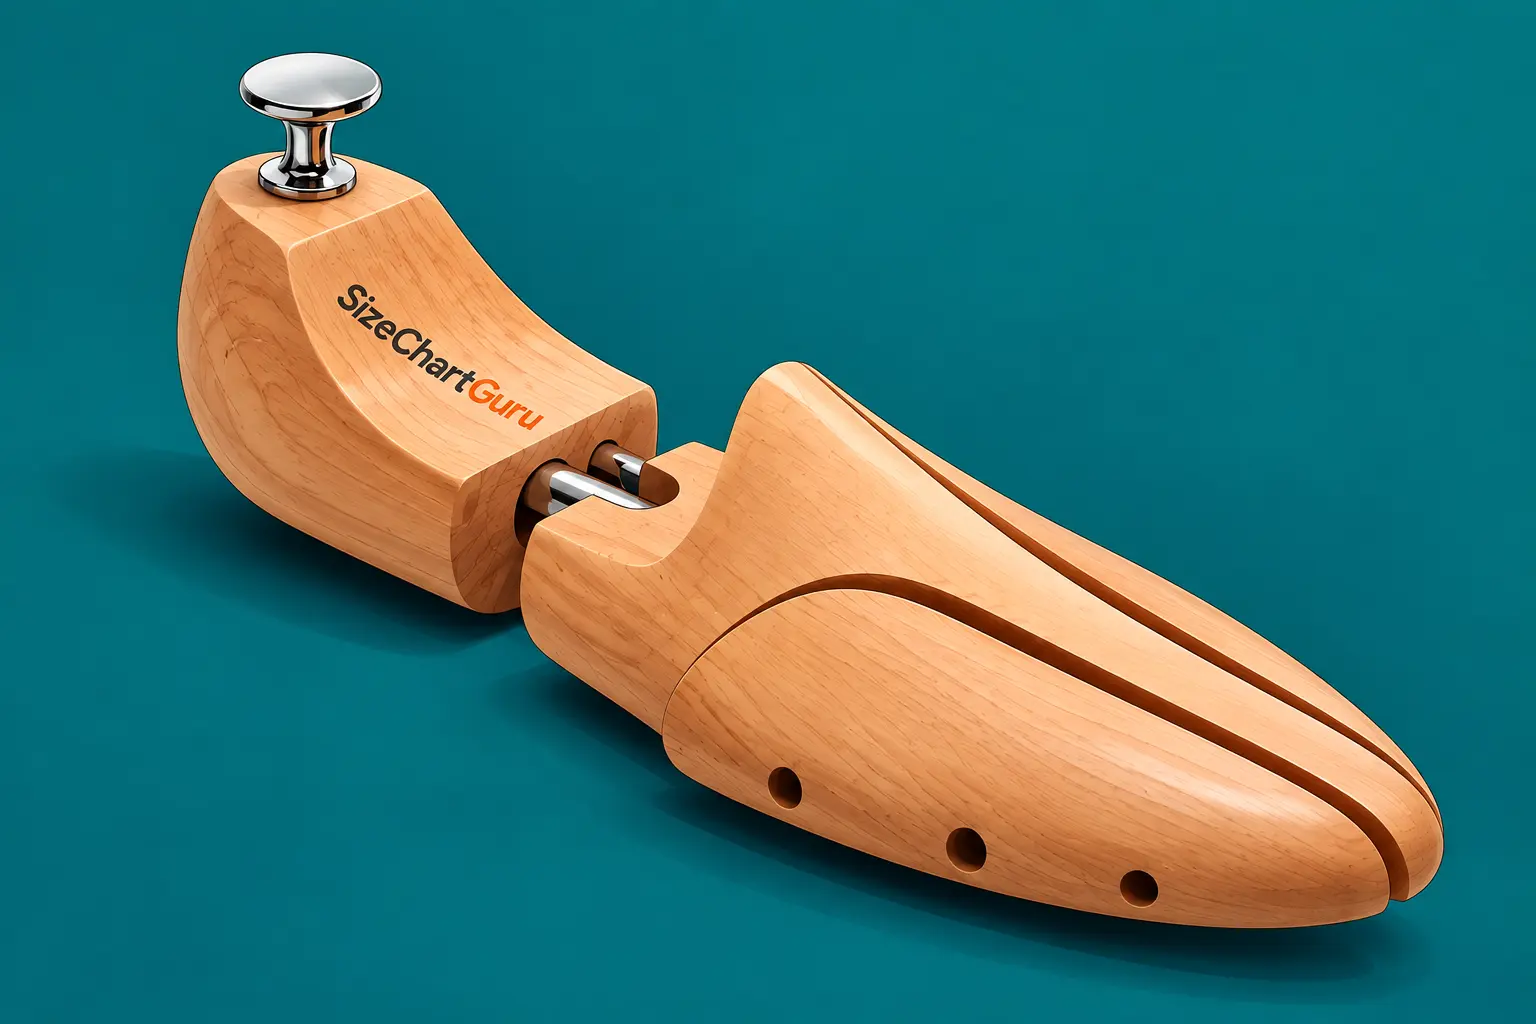
The two get lumped together quite a bit, but a regular shoe tree isn’t something I’d buy to stretch tight boots.
A shoe tree is mostly there to help your boots or shoes keep their shape between wears. If it’s made from unfinished wood, it can help absorb some of the moisture inside too.
Could it put a little tension on the leather? Sure. But that’s not what I’d reach for if a pair of boots was squeezing my feet. That’s a job for a stretcher.
Watch out for boot shapers too, especially when you’re shopping for a calf stretcher. A shaper sits inside a tall shaft and keeps it upright, which can make it look like the tool you need. It isn’t going to open up a tight calf the way an adjustable stretcher will.
How Much Can You Actually Stretch Leather Boots?
Usually, not as much as people hope.
Leather gives you more to work with across the width and depth of the toe box than it does in length. If a boot pinches across the ball of your foot or presses down on your toes, you may be able to open that area up enough to make a real difference.
HELM Boots actually puts a number on it, saying its stretching process can generally give you about half a size in width.
I wouldn’t take that to mean every leather boot has half a size hiding in it, but it gives you an idea of why width is usually where you have more room to work.
Not everyone puts the number that high. Baker’s Boots says to expect about a quarter size at most. That’s a pretty good example of why I wouldn’t buy a tight pair assuming you’ve got a guaranteed half size waiting to be stretched out of them.
Length is another story. The leather upper can give, but the sole underneath it isn’t getting any longer.
A professional may still be able to create a little more usable room through the front of some boots. Brett Viberg says professional stretching can sometimes gain around a quarter to half a size in length, but that doesn’t mean the sole itself has become longer, and I certainly wouldn’t treat that amount as guaranteed.
Safety-toe boots give you even less to work with around the toes. Steel and composite toe caps aren’t going to stretch along with the leather. If your toes are crowded against the safety toe, I wouldn’t count on stretching to fix the fit.
How much you can gain also depends on the leather and the way the boot is built.
Boot shafts are harder to put a number on. A soft, unlined leather shaft may give more readily than a thick, lined one.
Then you’ve got the zipper, stitching, and any reinforced panels to think about. Sometimes the leather isn’t what stops you. The rest of the boot does.
That’s why I wouldn’t promise a certain number of millimeters or tell you that every leather boot can be stretched half a size. There are too many variables.
So where would I personally draw the line? This is roughly how I look at it.
Before You Stretch Them: Check Where the Boots Are Actually Tight
Put the boots on first and figure out exactly what’s bothering you. If it’s one small pressure point, mark it lightly with chalk before taking the boot off. It’ll be much easier to position a stretching plug when you can actually see where it needs to go.
Pay attention to whether that pressure is sitting right on a thick seam, too. Sometimes you’re feeling two layers of leather overlapping rather than a section of the upper that simply needs more room.
A shoemaker may be able to flatten the troublesome seam instead of stretching the leather around it.
Pay attention to where the boot bends when you walk, too. The ball of your foot should sit around the part of the boot that’s flexing.
The ball of your foot should also line up with the widest part of the boot. If it doesn’t, stretching may be trying to fix a fit problem rather than simple tightness.
If the crease looks unusually far forward or back, the problem may be the fit rather than something you can fix with a stretcher.
Don’t judge that by the amount of boot you see in front of your toes, though. Some lasts are simply longer through the toe. A bit of extra space up front doesn’t automatically mean the boots are too big.
If the boots are only a little snug all over, give them some time around the house before buying anything. Start with 15 to 30 minutes at a time and see how the leather responds. You may find they needed breaking in more than they needed stretching.
Nicks Boots recommends conditioning leather before stretching to soften it up and make it easier to work with.
That can be particularly useful with thick full-grain leather. Just make sure the conditioner is suitable for your boots, and don’t overdo it.
Got one stubborn spot that keeps rubbing? Grab a spoon and work the leather from the inside. Use the rounded back and rub it firmly against the problem area for a few minutes.
It works particularly well around a stiff heel, and you can concentrate on that one spot without stretching half the boot.
For an even gentler stretch, you can pack the tight area firmly with rolled towels, rolled-up socks, or a slightly damp newspaper and leave it overnight. It won’t do what a proper stretcher can, but if you only need the leather to give a little, it’s worth trying.
Make sure you don’t soak the newspaper, as you’re only trying to give the leather a little pressure as it dries, and too much moisture inside the boot can cause problems.
If you’re using newspaper, avoid glossy or heavily colored pages that could transfer ink or dye.
How Do I Compare Boot Stretchers for My Needs?
Don’t assume a stretcher will fit just because the box says “boot stretcher.” Check the size range first, and check what part of the boot it’s actually designed to stretch.
The handle is easy to overlook, especially with tall boots. You need to be able to reach and turn it once the stretcher is down inside the boot. That’s why you’ll see boot models with extended or jointed handles.
I’d also look at how far the stretcher opens. You want enough adjustment for your boot, not the biggest number you can find.
And if you need to work on one small pressure point, make sure the model actually accepts plugs. Some come with several; others don’t.
The old rule about a 12 to 12.5-inch handle and 5.5 inches of extension is too specific to use as a general buying rule.
Current stretchers vary quite a bit in design. Some use extended handles, some jointed ones, and the dimensions depend on what the tool is made to stretch. I’d rather measure the boot I’m working with and buy accordingly.
How to Stretch Leather Boots Around the Calf
If the foot of the boot feels good but the shaft is squeezing your calf, work on the shaft.
Before you start stretching, check what’s actually stopping the shaft from closing.
- If the laces adjust the calf, loosen them and see how much room that gives you first.
- Then feel around the area that’s tight. A thick seam or reinforced panel may be doing more of the squeezing than the leather itself.
- Dry, stiff leather is another reason not to start pulling straight away. Condition it first, provided the conditioner is suitable for the leather, and let it become supple before you start stretching.
Method 1: Try Thick Socks First
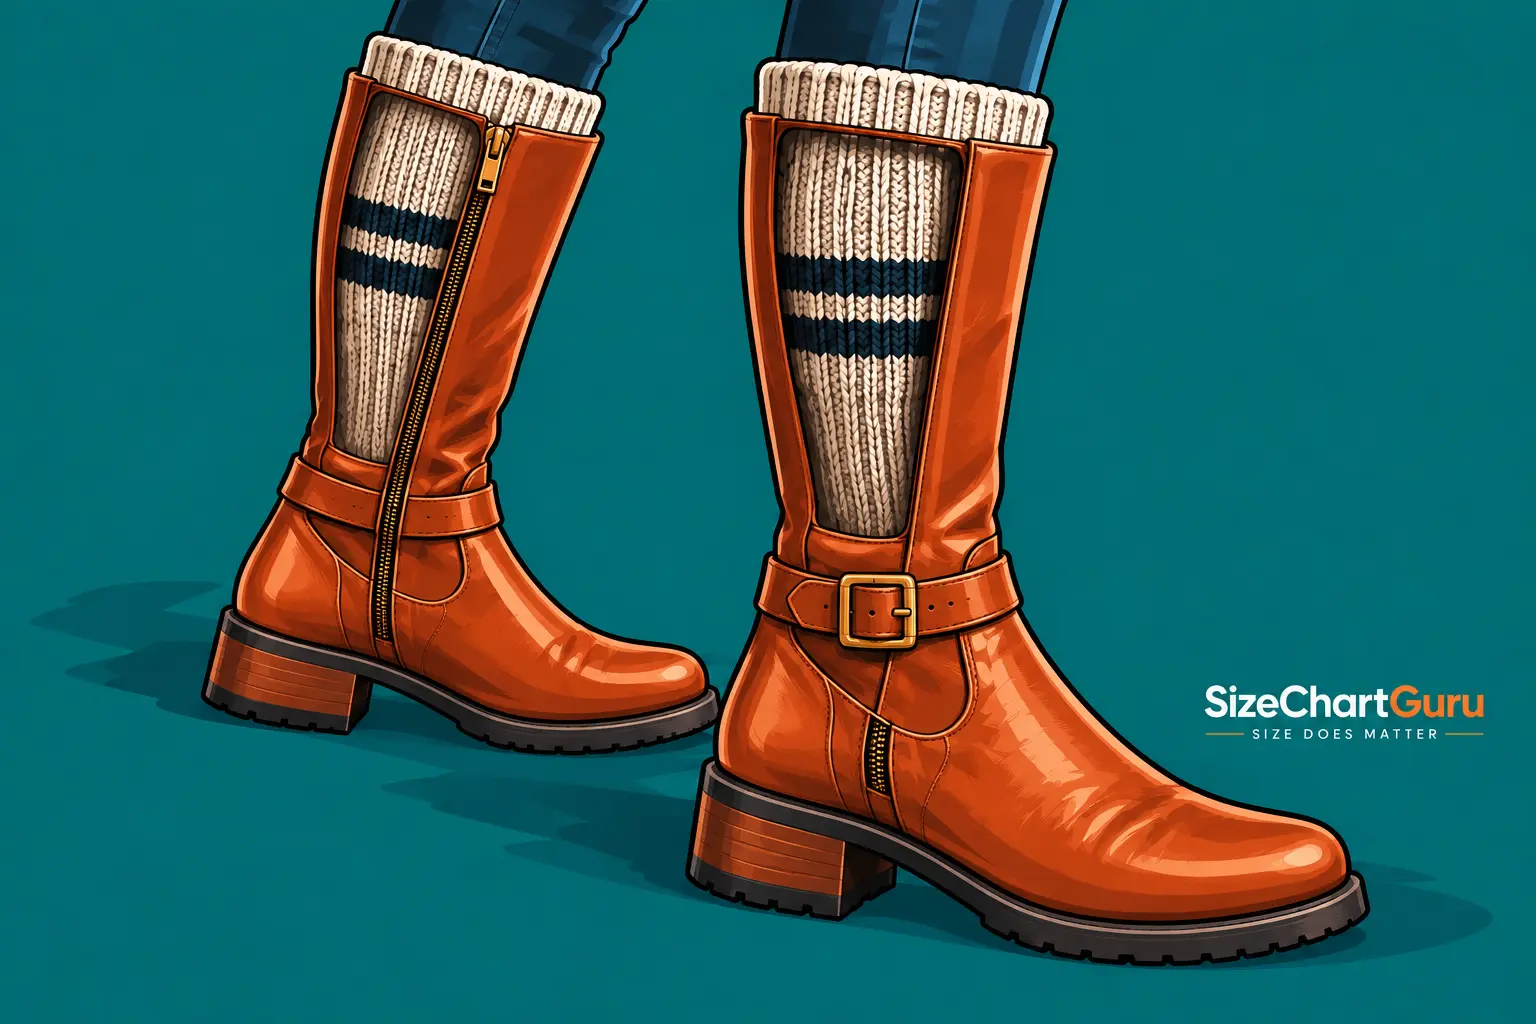
If the calf is only a little tight, try the boots with a thicker pair of socks and wear them around the house for about 30 minutes at a time. Move around normally and see whether the leather starts to loosen.
Don’t force this one. If you’re fighting with the zipper or the boots are digging into your calves, adding thicker socks is only going to make an already tight boot tighter.
For a small amount of snugness, though, I’d try this before putting anything on the leather.
Method 2: Massage the Tight Area by Hand
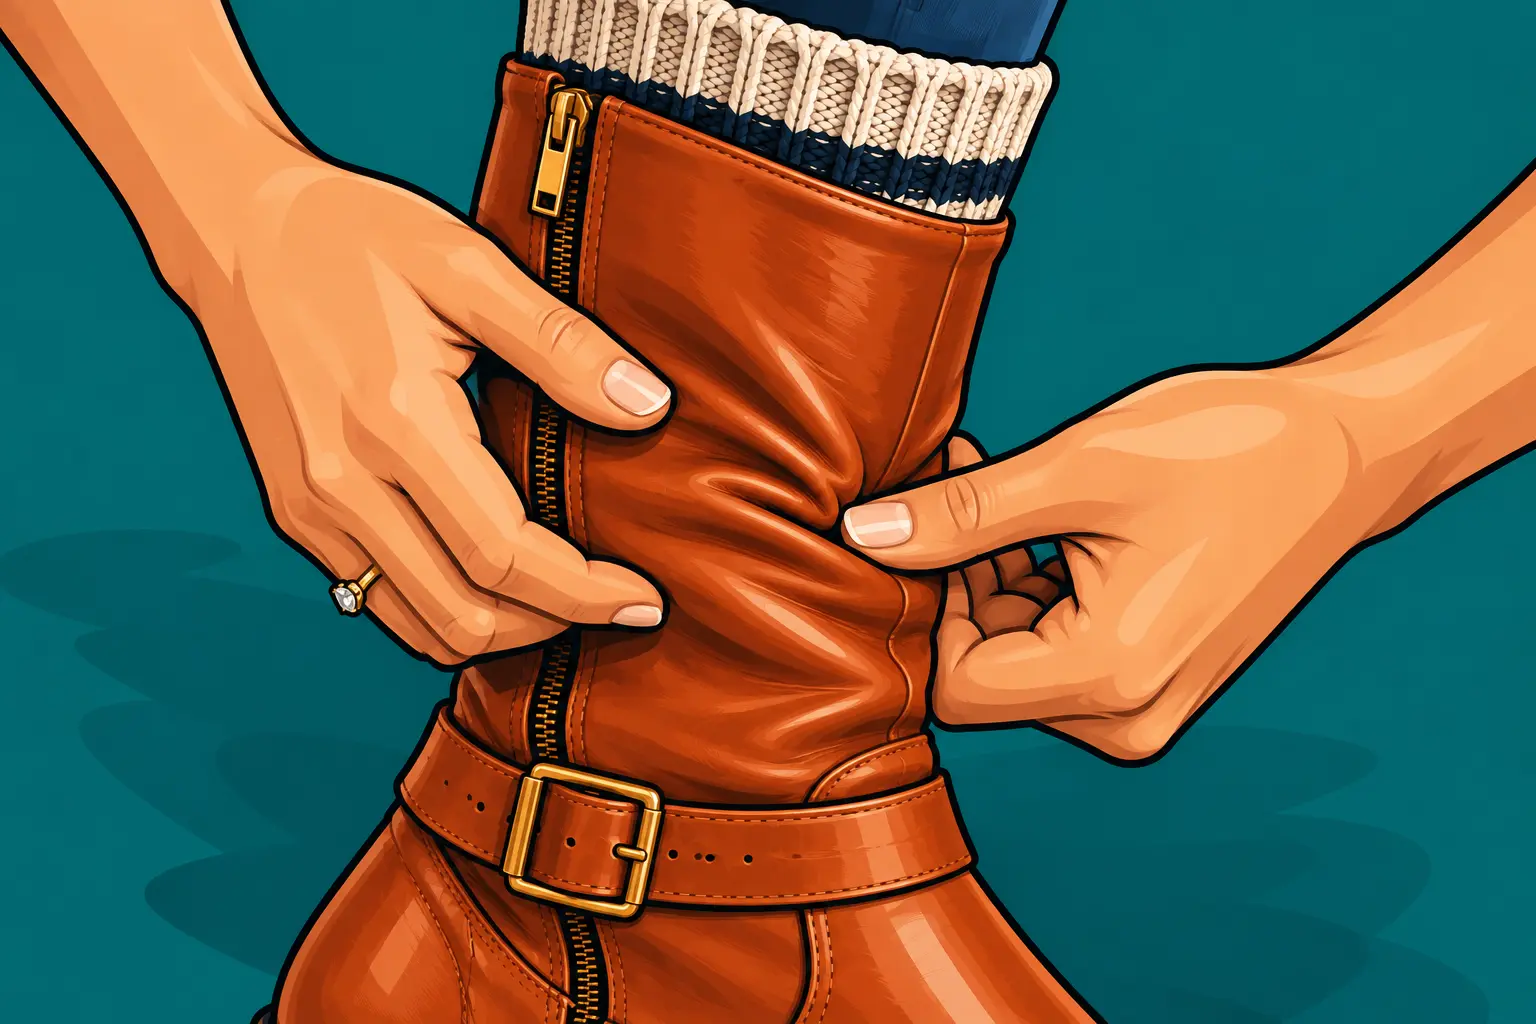
Got one patch of leather that refuses to give? Put a little conditioner on it, provided it’s suitable for that leather, and work the area with your fingers.
Massage the leather and give it a gentle pull in the direction you need more room. Spend a few minutes on the stubborn area, then put the boots back on and see how they feel.
This won’t do much for a boot that’s seriously tight around the calf.
Method 3: Use a Boot-Calf Stretcher
For a stubborn shaft, I’d rather use a calf stretcher. You have much more control over where the pressure goes and how much you’re applying.
You can use a leather stretching spray here too. Apply it to the tight area according to the directions on the bottle, then put the stretcher in while the leather is still damp.
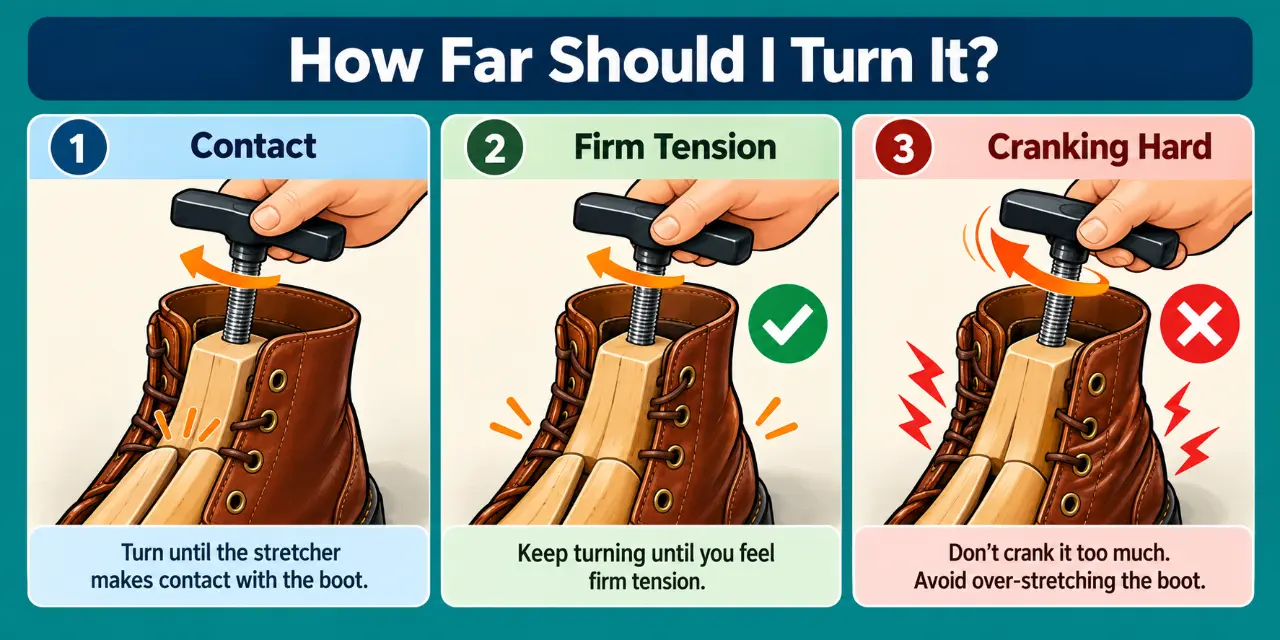
Close the stretcher enough to slide it into the shaft, then open it until you have firm tension on the leather. Stop there. The shaft should feel stretched, not strained.
Leave it overnight, then take the stretcher out and try the boot on. If you still need more room, put it back in and add a little more pressure. I’d rather give the leather another night than try to force the whole stretch in one go.
Go easy with the handle.
Potter & Sons says this can take four or five days when they’re working gradually. That’s a useful reminder that overnight isn’t a deadline. It’s simply a good point to check the fit before deciding whether the boot needs another round.
Method 4: Alcohol and Water
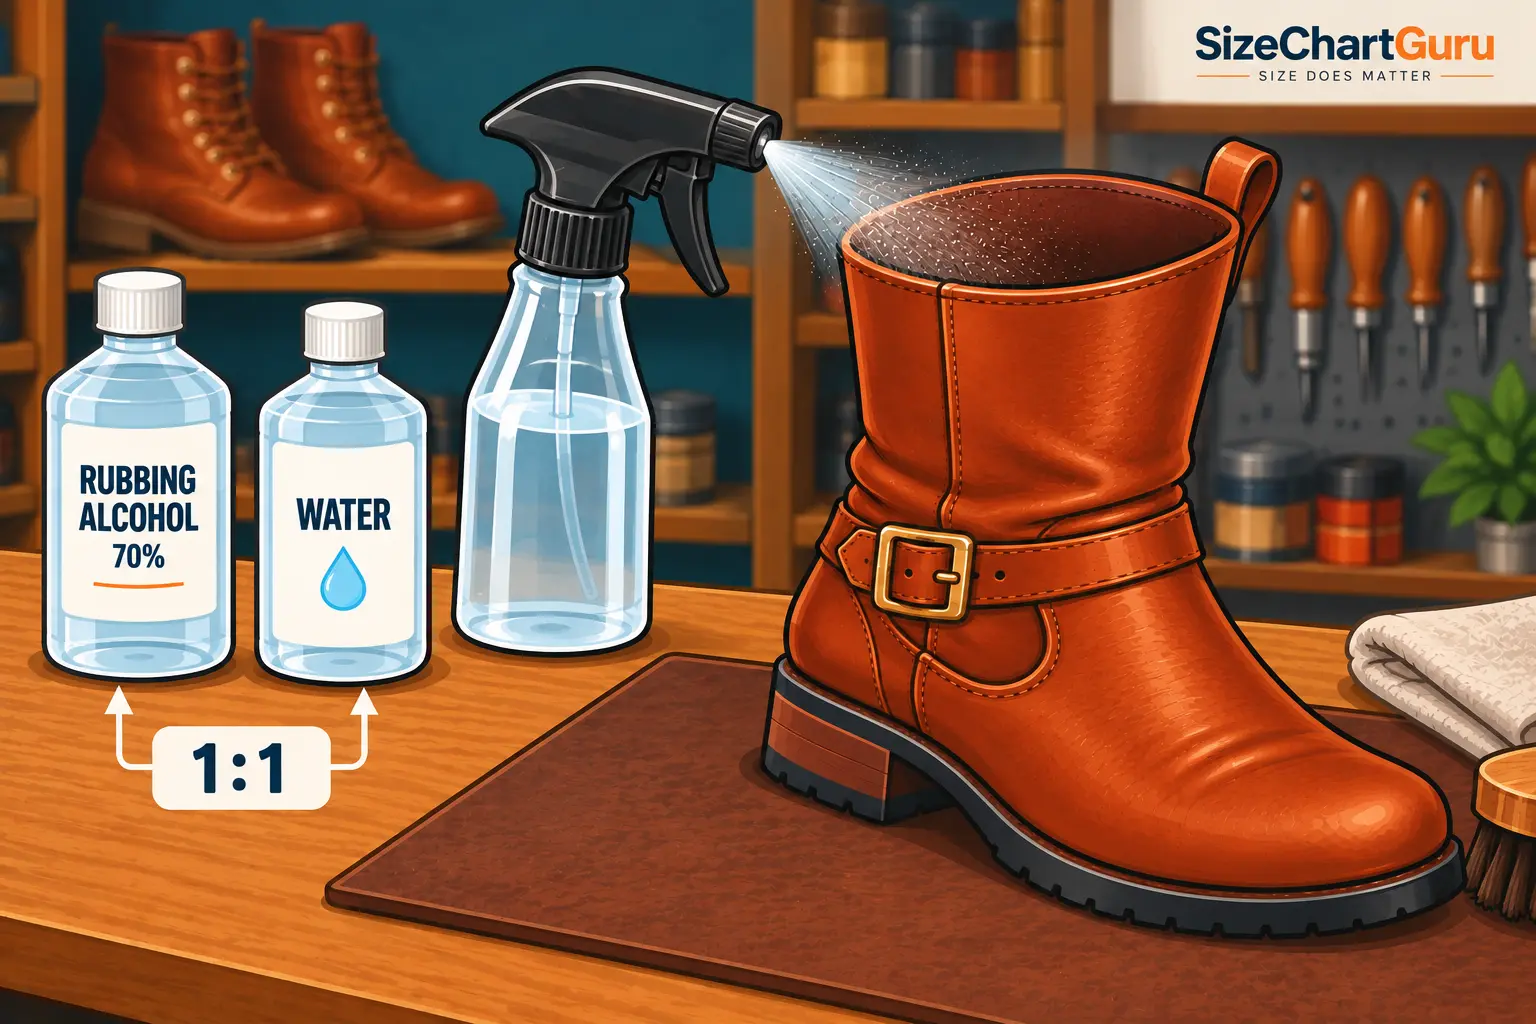
The old cobbler’s mix is pretty simple: half rubbing alcohol, half water. Put it in a spray bottle and mist the inside of the shaft where it’s tight. Don’t drench the leather.
While that area is still damp, put the calf stretcher in and open it until you have firm tension on the leather. Leave it stretched while the leather dries.
I wouldn’t use this blindly on every leather. Alcohol can affect some dyes and finishes, so test the mixture somewhere inconspicuous first.
I’d leave suede and nubuck out of this one, and I wouldn’t experiment on an expensive pair with a finish I wasn’t sure about. That’s where I’d use a proper stretching product or let a cobbler handle it.
If stretching still doesn’t give you enough room, a cobbler may be able to add a gusset to the shaft. That’s a bigger alteration, but it makes more sense when you need considerably more calf room than the leather can realistically give you.
How to Stretch Leather Boots at the Toe
If your toes are packed tighter than sardines, first figure out what’s actually happening. Are they being squeezed from the sides, or are they hitting the front of the boot?
Those aren’t the same problem.
If Your Toes Are Squeezed From the Sides
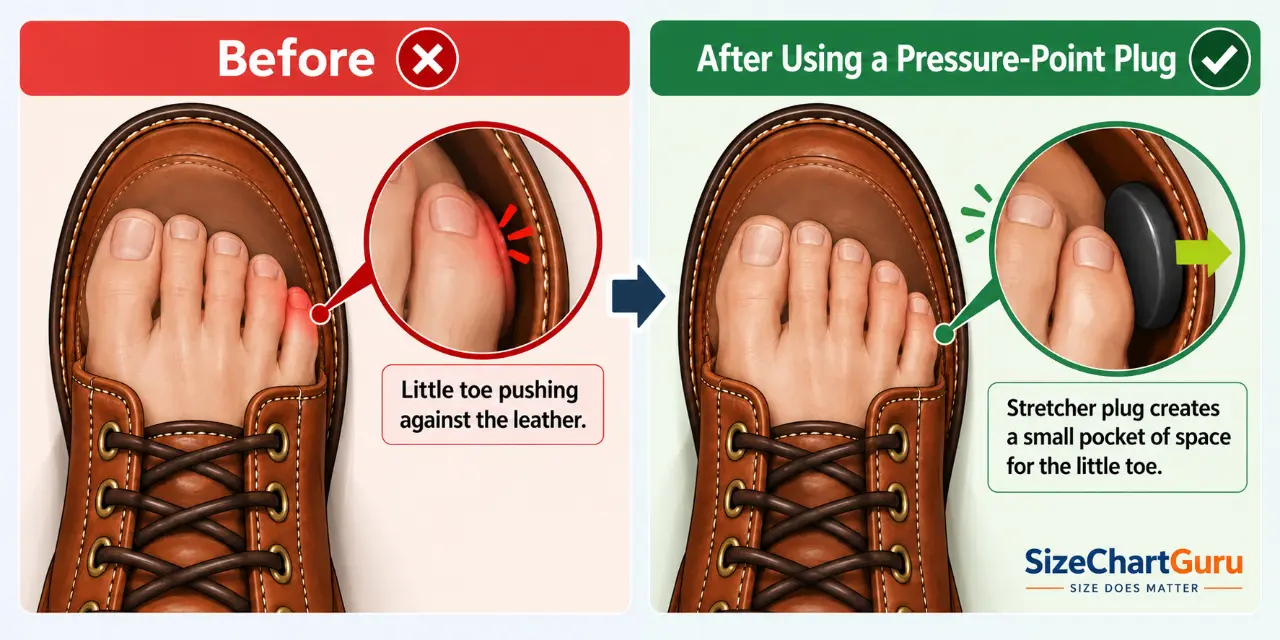
If the squeeze is coming from the sides, I’d use a forefoot stretcher. Open it until you’ve got some pressure against the leather, then stop. More turns aren’t necessarily going to give you a better stretch.
You don’t always need to widen the entire toe box, either. If it’s just your little toe rubbing, this is where those pressure-point plugs come in handy.
Position a plug at that spot and let it push out a small pocket of extra room.
Go slowly around the toe. There’s more than leather up there, and I wouldn’t crank hard against a structured toe box just because the handle will keep turning.
If Your Toes Hit the End of the Boot
This is where I’d stop reaching for the stretcher.
A 2-way stretcher may create a touch of extra room, but it won’t turn a short boot into the next size up. If your toes are already hitting the front when you’re standing, I’d exchange the boots if that’s still an option.
Don’t try to make up the difference by winding the stretcher farther forward. You can distort the toe before you create enough room to solve the actual fit problem.
Can You Stretch Leather Boots With a Hair Dryer?
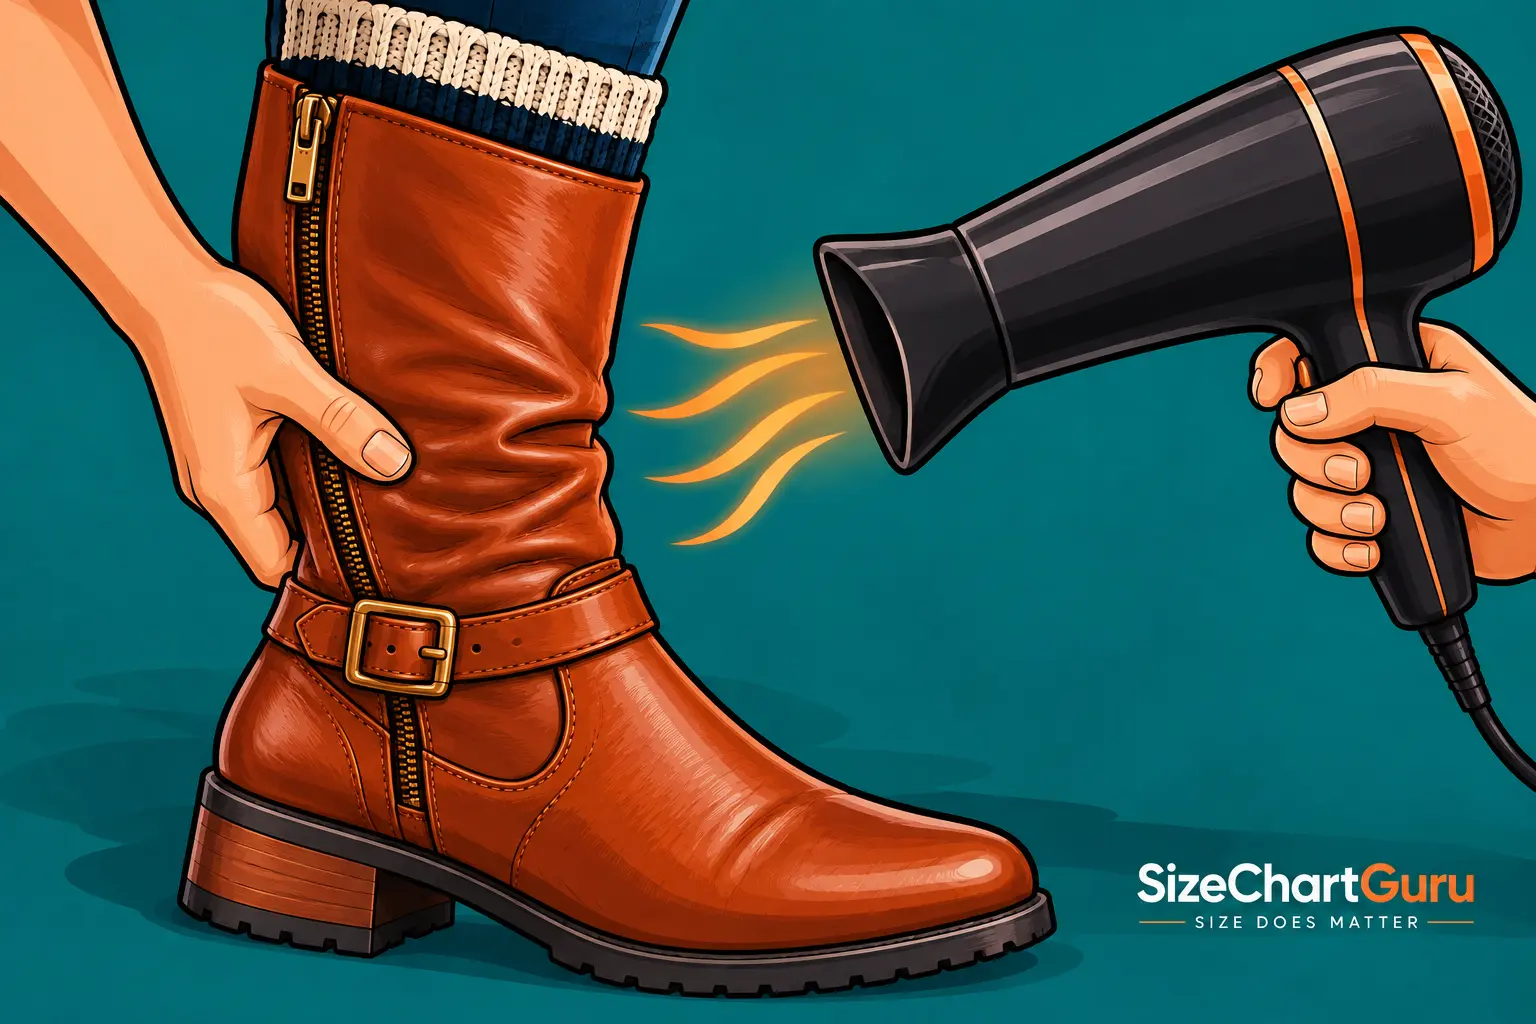
You’ve probably seen this trick before. Put on two or three pairs of thick socks, squeeze your feet into the boots, then point a hair dryer at the tight areas.
I’m cautious with this one, although the advice from boot companies is surprisingly mixed.
Timberland, for example, recommends a short 20-second blast while you’re wearing the boots and warns against overheating the leather.
Baker’s Boots also describes controlled use, with the dryer held four to six inches away for about a minute.
Red Wing goes the other way and warns against using a hair dryer because direct heat can dry leather out.
Potter & Sons makes a similar point: “You don’t want to put too much heat on the leather at one time because it’ll really mess up the fiber.”
That’s the distinction I’d pay attention to. The sources that do recommend a hair dryer generally describe brief, controlled heat, which is very different from blasting one tight spot for several minutes.
If the boots need more room, I’d use a stretcher and leave the hair dryer out of it. Give the stretcher a night to work. Still tight the next morning? Put it back in.
With bootmakers giving such different advice, I wanted to see which view was more common. So I checked 47 footwear sources:
Here’s What 47 Footwear Sources Say About Heat
There’s enough conflicting advice about hair dryers that I wanted to see what boot companies and footwear specialists actually say.
So I checked published boot-care, break-in, stretching, and drying guidance from 47 boot brands, bootmakers, retailers, and footwear or leather-care specialists.
I sorted each source by what its published guidance actually said about heat. I didn’t count silence as approval, and I kept brief, controlled heat separate from warnings about direct or excessive heat.
16
13
1
17
Of the 47 sources I reviewed, 16 warned against or discouraged direct heat, while 13 described some form of controlled heat use.
Another 17 didn’t publish a clear position in the guidance I found, and one discussed heat only for a specific leather-care process.
The split is interesting, but I wouldn’t read it as a vote on whether a hair dryer is safe. The companies that do recommend heat generally describe short, controlled exposure, not blasting the leather until it gets hot.
On the other side, several bootmakers specifically warn that too much heat can dry out or damage leather.
That’s why I still prefer a boot stretcher when I have the choice, especially with an expensive pair. It’s slower, but I have much more control over where the pressure goes.
❌ Sources That Say No to Direct Heat (16)
| Brand | Hair Dryer / Heat | Published Guidance |
|---|---|---|
| Frank’s Boots | ❌ No | No blow dryers or direct heat. |
| Wesco | ❌ No | No blow dryers or heating elements. |
| Wolverine | ❌ No | Says not to use heat. |
| Red Wing | ❌ No | Heat can dry, stiffen, and crack leather. |
| Truman Boot Co. | ❌ No | Heat can shrink, deform, and crack leather. |
| Tricker’s | ❌ No | Direct heat can crack leather. |
| Meindl | ❌ No | Heat can make leather brittle and cracked. |
| Hanwag | ❌ No | Keep boots away from heat sources. |
| LOWA | ❌ No | Heat can shrink or crack leather. |
| Scarpa | ❌ No | Heat can damage leather and adhesives. |
| Zamberlan | ❌ No | Heat can damage leather and bonding. |
| Ariat | ❌ No | Heat can dry leather and affect its shape. |
| Blundstone | ❌ No | Keep boots away from direct heat. |
| KEEN | ❌ No | Air dry away from heat. |
| Salomon | ❌ No | Avoid external heat. |
| L.L.Bean | ❌ No | Dry away from direct heat. |
⚠️ Limited or Controlled Heat (13)
| Brand | Hair Dryer / Heat | Published Guidance |
|---|---|---|
| White’s Boots | ⚠️ Controlled | Avoid intense heat; PEET dryer is okay. |
| Danner | ⚠️ Controlled | Boot dryer okay; avoid high heat. |
| Timberland | ⚠️ Yes, briefly | Low heat for about 30 seconds during break-in. |
| Nicks Boots | ⚠️ Specific uses | Hair dryers can be useful in certain situations. |
| Walk London | ⚠️ Yes, briefly | About 20 seconds from roughly 6 inches away. |
| HELM Boots | ⚠️ Yes | Recommends thick socks and a hair dryer on tight spots. |
| Tony Lama | ⚠️ Yes | Allows a hair dryer on tight areas; don’t overheat the leather. |
| Baker’s Boots | ⚠️ Yes, controlled | About 1 minute from 4–6 inches away. |
| Overlook Boots | ⚠️ Yes, controlled | Medium heat for 1–2 minutes from at least 5 inches away. |
| Buffalo Jackson | ⚠️ Yes, with caution | Uses a hair dryer with thick socks, but describes the DIY method as risky and recommends conditioning afterward. |
| Qüero Shoes | ⚠️ Yes, controlled | Recommends heating the inside for 1–2 minutes, followed by cedar shoe trees overnight. |
| Leather Skin Shop | ⚠️ Yes | Recommends no more than 30 seconds per tight area, then letting the boots cool while still wearing them. |
| Rydale | ⚠️ Yes, controlled | Recommends low heat for 20–30 seconds and warns against overheating the leather. |
🔥 Heat Allowed for a Specific Leather-Care Job (1)
| Brand | Hair Dryer / Heat | Published Guidance |
|---|---|---|
| Parkhurst | 🔥 Specific use | Allows heat when re-waxing Waxy Commander leather. |
❓ No Clear Position Found (17)
| Brand | Hair Dryer / Heat | Published Guidance |
|---|---|---|
| Chippewa | ❓ No explicit position | Air drying advised; no heat warning found. |
| Justin Boots | ❓ No explicit position | No explicit position on heat found. |
| BRUNT | ❓ No explicit position | Air drying advised; no heat warning found. |
| Viberg | ❓ No explicit position | Let leather dry; no heat warning found. |
| Thorogood | ❓ No explicit position | No heat guidance found in its stretching advice. |
| JK Boots | ❓ No explicit position | No position on hair dryers or heat found. |
| Dr. Martens | ❓ No explicit position | No explicit position on heat found. |
| Thursday Boot Company | ❓ No explicit position | No explicit position on heat found. |
| DIEVIER | ❓ No guidance found | No official heat guidance found. |
| Christian Daniel Boots | ❓ No guidance found | No official heat guidance found. |
| Cordobés Boots | ❓ No guidance found | No official heat guidance found. |
| TAFT | ❓ No guidance found | No official heat guidance found. |
| Redback | ❓ No guidance found | No official heat guidance found. |
| Oak Street Bootmakers | ❓ No guidance found | No official heat guidance found. |
| Grant Stone | ❓ No guidance found | No official heat guidance found. |
| Carolina | ❓ No guidance found | No official heat guidance found. |
| Georgia Boot | ❓ No guidance found | No official heat guidance found. |
Does the Freezer Trick Work?
People have been putting bags of water inside tight boots and throwing them in the freezer for years. The idea is simple. Water expands as it freezes, and that expansion puts pressure against the inside of the toe box.
You don’t need a stretcher for this one, just a couple of freezer bags and enough room in your freezer for the boots.
If the boots are new, check the return and warranty policy before you try this. Freezing them as part of a DIY stretching attempt could leave you stuck with a pair you could otherwise have returned.
Here’s how to do it:
- Put enough water in each freezer bag to fill the tight area of the boot, leaving some room in the bag, then seal it carefully.
- Push the bag into the toe area of the boots. Make sure the water is sitting against the area you want to stretch.
- Put the boots in the freezer for about 12 to 24 hours.
- Let the ice thaw for a while before you try to remove the bag. Don’t yank a solid block of ice out of the boot just because the stretching is finished. You could damage the leather or stitching on the way out.
- Try the boots on and see whether you’ve gained enough room.
I would be careful with this method, though. I wouldn’t assume every leather boot is going to be perfectly happy spending a night in the freezer.
Watch where the bag is pushing too, especially around the seams. And make sure it’s properly sealed. Water leaking inside the boot is the last thing you want.
For an expensive pair of boots, I’d use a proper stretcher instead.
How to Stretch Leather Boots for Width
If the boots are the right length but squeeze across the ball of your foot, a boot stretcher can give you some extra width.
Make sure width is actually what you need, though. If your boot is squeezing the sides of your forefoot, you want the stretcher to push outward.
Pressure across the top of your foot is different. That’s an instep or vamp problem, and you need a stretcher designed to create more height there.
Close the stretcher before you put it into the boot and push it forward until the stretching block is sitting where the boot feels tight.
Turn the handle until the stretcher meets the sides of the boot. From there, add a little more pressure. You’re looking for firm tension on the leather, not as much force as the stretcher can possibly produce.
Leave the stretcher in overnight, then take it out and try the boot on.
If you still feel pressure across the forefoot, put the stretcher back in and open it a little farther. Another gradual stretch is better than trying to force all the extra width out of the leather in one go.
There’s a limit to what you can gain here. I wouldn’t promise a certain number of millimeters because one boot may give noticeably more than another.
Leather thickness, lining, and the way the boot is built all affect how much it will give.
And sometimes the whole forefoot isn’t the problem. If it’s just your little toe causing trouble, use a pressure-point plug on that side. No need to make the whole boot wider for one stubborn spot.
Stretching Spray vs Rubbing Alcohol
Between the two, I’d reach for a leather stretching spray first. You apply it to the tight area, then wear the boots or put the stretcher in while the leather is still damp.
If you’re using moisture to help with the stretch, keep the boot stretched until that area has dried rather than taking the stretcher out while the leather is still wet.
If it’s a product you haven’t used on that leather before, test a small hidden area first.
The rubbing alcohol and water mix is the cheaper DIY option. A 50/50 mix of rubbing alcohol and water is a commonly recommended starting point. Spray it inside the tight area, then wear the boots or use a stretcher while the leather is damp.
There’s no single recipe, either. Baker’s Boots uses a milder mix of one part isopropyl alcohol to three parts water, while other bootmakers have recommended stronger mixtures.
Tony Lama actually recommends rubbing alcohol for tight cowboy boots, although its method uses a small amount inside the boot rather than soaking the leather. You then put on thick socks and wear the boots for a few hours.
A commercial spray doesn’t get a free pass either. Leather finishes vary, and some products aren’t meant for suede or nubuck. Read the bottle and test a small hidden spot if you’re unsure.
For an old pair of everyday boots, I can understand trying the alcohol mix. With an expensive pair, I’d spend a few dollars on something actually made for stretching leather.
When I’d Take the Boots to a Cobbler
Some boots aren’t worth experimenting on at home.
If I’ve paid enough for the boots that ruining them would make me sick, that’s usually my answer. They go to a cobbler.
I’d do the same with leather I wasn’t sure about, especially something delicate or exotic. Heavy linings can complicate things too. You may be stretching more than the leather you can see from the outside.
I’d also be careful with a tall boot when the zipper is already fighting for its life. Asking for a substantial calf stretch puts pressure on more than the shaft. The zipper and stitching still have to live with whatever extra room you’re trying to create.
Safety boots are another one I’d leave alone if the stretch involves the reinforced toe or other protective parts. I wouldn’t start pushing those around and assume the boot still protects your foot exactly as intended.
Then there are the awkward jobs. Maybe one tiny spot needs more room and you can’t get a plug in quite the right place. A cobbler can bump out that particular area instead of stretching the whole boot.
The same goes for a thick seam that’s pressing into your foot. Sometimes the better fix is to flatten or work the seam rather than stretch the leather around it.
And if you’ve already tried a gentle stretch and the leather barely moved, a cobbler has better equipment for that than another heroic turn of the handle.
You don’t need professional help every time a boot feels snug. But when I’m looking at an expensive pair, an unfamiliar leather, or a stretch big enough to make me nervous, I’m happy to hand the problem to somebody who does this for a living.
After Stretching: Help the Boots Hold Their New Shape
Once the stretcher comes out, wear the boots for a bit before deciding they need more work. That first stretch may have been enough.
If the leather is damp, don’t rush the drying. Leave the boots somewhere with decent airflow and let them dry on their own. No radiator, and definitely no return of the hair dryer.
For tall boots, this is where rolled newspaper or a towel comes in handy. Tuck some inside the shaft so it doesn’t collapse while the boot dries. Don’t pack it in hard. You’re only supporting the shape you’ve already made.
I wouldn’t condition leather automatically just because you’ve stretched it. If it got wet during the process or feels dry afterward, then conditioner may make sense. Just make sure you’re using something suitable for that leather.
Did the Stretch Work?
Try the boots with your usual socks. If that tight spot isn’t bothering you anymore, you’ve probably done enough.
A little extra room is what you’re after. If your foot has started sliding around inside the boot, you’ve gone farther than you needed to.
Still seriously tight after a couple of reasonable attempts? I’d stop there. At some point you’re no longer stretching the boots. You’re trying to turn them into a different pair.
Don’t assume you can just undo an overstretch, either. Leather may shrink again, but it won’t necessarily return to exactly the size and shape you started with.
Check our sizing guides for Nicks, White’s, Viberg, Danner, Thursday, and Wesco before buying your next pair.
Got a stretching method that’s worked particularly well for you? Let me know in the comments. I’m especially curious about the stubborn pairs that took more than one round to get right.